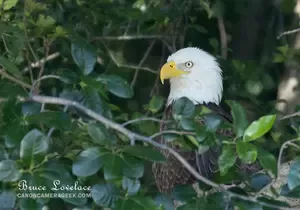
Guide To Canon Camera Settings
 Canon Shooting Modes
Want to understand Canon camera settings? Canon digital cameras have a tremendous amount of technology built into them, and along with that comes a complex array of camera setting and shooting modes.
This complete guide will help you decide when to use both the simple settings and the more advanced settings to get the most out of your Canon camera.
You'll get a basic grasp the different categories of Canon camera settings and modes. There are shooting modes, exposure modes focusing settings, image quality settings, custom function settings
We'll start with understanding the 3 basic settings that effect the exposure of your photo. These are very important!
Basic Camera Exposure Settings
There are the 3 basic camera settings on your Canon camera that affect exposure. A basic understanding of these is important to get before you actually experiment with trying different Canon camera settings and modes.
The factors that exposure are aperture, shutter speed, and ISO. The subjects you photograph and the lighting at the time will affect the settings you and your camera decide to use.
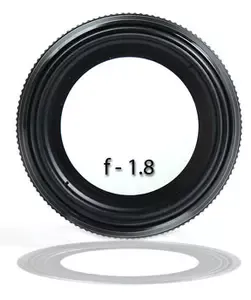
1. APERTURE. Aperture is the size of the lens opening when the shutter is opened to let light enter into your camera and strike the sensor. Apertures are expressed as f/stop numbers.
F/stops are actually fractions, so an f/stop of f/4 means the lens opening size is 1/4. You need to understand this because an f/stop of f/8 (1/8) is a smaller lens opening size than f/4, so f/8 lets less light into the camera than f/4.
2. SHUTTER SPEED. How long the shutter stays open and allows light to enter the camera during exposure is shutter speed. Usually, it's expressed as a fraction of a second, such as 1/60 second, but in some unique situations the shutter may stay open as long as a few seconds, 10 minutes or even longer.
3. ISO. The ISO is a setting that controls the sensitivity of the sensor. A low ISO number (such as 100 or 200) means the sensor is moderately sensitive to the light that enters the camera. A high ISO (such as 1000 or higher) means the sensor is very sensitive to light and does not need as much to attain a properly exposed photo.
Understand how these 3 factors (aperture, shutter speed, and ISO) interact and you're command of camera settings will come so much easier to you.
Once these 3 settings are set, whether you set them or your camera does it automatically, you also have a setting that you can use to brighten or darken the photo if you want to take it again. That's called exposure compensation. More on that in a minute.
I can't encourage you enough to watch this video below. It's an outstanding explanation of how theses 3 settings work together through what's called the exposure triangle..
Now that you have that basic understanding of the what shutter, aperture, and ISO do, you can explore the different Canon shooting mode settings.
Canon Camera Shooting Mode Settings
Canon cameras have different shooting "mode" settings. There are fully several automatic, semi-automatic, and manual modes that modern Canon cameras have, so it can be confusing.
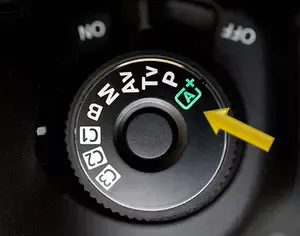
 Mode Dial
4. MANUAL MODE. Manual mode refers to a mode where you, the photographer set both the shutter speed and lens aperture (and the ISO setting) manually without letting the camera set these settings automatically.
Generally, manual mode is used by experienced photographers, in educational situations (I teach it in workshops), or specific situations like long exposure and nighttime photography. I always use Manual with indoor portrait studio photos where I'm lighting my subject with professional strobes.
5. PROGRAM MODE. I nicknamed Program Mode as Beginners Mode because it's a good place to start. Your Canon camera will set both the shutter speed and aperture, but you can change one of those and the camera will make the adjustment of the other to give you a properly exposed photo
6. SCENE INTELIGENT AUTO MODE. Think of it as the AI artificial intelligence mode. I've hear some photographers call it the dummy mode. It shows up as an A+ on the mode dial. Use this setting and the camera will set EVERYTHING for you.
It kind of makes your camera behave like a point and shoot camera. Shucks, you can't even control the focus!
7. SHUTTER PRIORITY. Also referred to as Shutter Mode, shutter priority means that you choose the shutter speed and the camera will determine the f/stop number to give you a proper exposure. Canon uses the abbreviation of Tv.
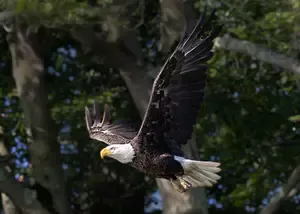
Shutter priority is commonly used for action photos and wildlife photography. I use a shutter priority setting for shooting soccer games and birds in flight.

8. APERTURE PRIORITY. Abbreviated as Av. Also sometimes referred to as Aperture Mode, in this shooting mode you set the f/stop number and the camera decides on the best shutter speed to use to get a good exposure.
Aperture mode is most often used for portraits and landscapes. It's critical that you control the range of things, the depth of field, in your photos.
I recommend you graduate to aperture priority as soon as you can. I shoot 90% of the time in aperture priority, but you're shooting style and preferences will develop in a way that's best for you. Here's the complete guide to understanding aperture.
9. EXPOSURE COMPENSATION. There may be times when you want to adjust the exposure to be brighter or darker than what your camera "thinks" is the right exposure. If you want a certain effect, or if the camera was fooled by the lighting situation into making a bad choice for settings, you can compensate up or down to lighten or darken your overall photo.
10. FLEXIBLE PRIORITY MODE. Designated as Fv by Canon, this is one of the newest modes Canon have incorporated into their recent cameras. I don't recommend this setting unless you are an experience photographer with a solid understanding of the exposure triangle. It can be very confusing.
Set your camera to Fv and you can control any one of those 3 basic exposure settings we discussed earlier, and the camera handles the other two.
Canon Focus Settings
 Manual or Auto-focus
The first choice you get to make is whether you're going to use one of the auto-focus settings or manual focus. The overwhelming majority of photographers want their lens to automatically focus for them.
11. MANUAL FOCUS. Manual focus gives you , the creative artist, 100% control of the exact point of focus. The simplest to understand, you slide the switch on the side of your lens to M and then turn the focusing ring on the lens until you visually see where you want to focus is sharp.
Some lenses have a manual override where you turn the focusing ring and it will stay where you stop even though you're set on auto-focus.
12. AUTO FOCUS. Canon cameras that have been built in the last few years have remarkably accurate focusing capabilities. The most important setting to know how to set the auto-focus so that it performs right for the situation you're shooting in. That's a complex topic that varies a lot by camera.
Video Of Canon Focus Mode Settings
You should read the specifics in your Canon model's user manual. To show you how confusing it can be, watch the video below. I shoot photos and video using 3 different Canon camera bodies. Their focus settings are different and I can get confused, too.
What's great is that you can set your camera to focus on just one spot in your scene, a small area, or use the entire scene to determine focus. You can also pick the area within your frame where you want it to be focused.
Each Canon camera model has very specific and settings on focus tracking of moving objects as well as different focus area mode selections. It's a constantly evolving technology.
Exposure Metering Modes
13. FULL FRAME METERING. Similar to selecting the size of the area for focusing, you can select a small spot, a small area, or the entire sensor to determine the best exposure. I recommend you set your camera for the entire area to determine the best exposure and then use exposure compensation if you judge the image to be darker or lighter than you want.
Keeping things as simple as possible is the best way to allow you to pay attention to the composition of your photograph.
Canon Quality Settings
You can adjust your Canon to record RAW files and/or processed jpg images as well as different resolutions of both of these formats. There are two main concepts you need to understand about your camera settings with respect to quality.
14. LARGEST JPG SIZE. First, I recommend you ALWAYS set your image quality to the highest possible setting. Earlier on in the progression of digital photography, there were several legitimate reasons to keep image file sizes small. Emailing and memory storage are two examples. Those reasons don't exist anymore. Camera memory card capacities are huge now and prices are dirt cheap.
Canon cameras produce high quality jpg files that can be edited in many ways afterwards.
15. RAW MODE. Second, to dispel one of the myths on quality, shooting in RAW mode does not automatically mean higher quality than shooting jpg mode. RAW vs. jpg is one of the hottest debated topics in the world of digital photography.
RAW does give YOU the ultimate control of processing you images an infinite number of different ways for different effects afterwards.
Shooting RAW is a great camera setting to use if you want to experiment with processing your photos with software. You get to make unlimited adjustments with software. Shooting in RAW also gives you a lot of insurance if you have an exposure that is over or under and if your photo is off color.
Use the highest jpg quality setting if you want to keep it simple. You can still set different "picture styles."
Picture Style Settings
You can set your camera to process the data from the camera's sensor to get different looks with your photos. These picture style settings may include Auto, Standard, Portrait, Landscape, Neutral, Faithful, Fine Detail, and Monochrome.
Picture style affects how your image data (your photos) are processed by the camera's software. The jpg images are permanently altered whereas the effects if you shoot in RAW mode where the photos are only temporarily viewed on your camera's LCD panel.
Your Canon camera will have some or all of the following picture style settings. Read when each setting should be used.
16. STANDARD. Set your picture style to standard if you want vivid images with increased sharpness, saturation, and contrast.
17. PORTRAIT. Portrait picture style is used to reduce edge sharpness for smoother looking skin. Tones and saturation are adjusted for natural looking skin.
18. LANDSCAPE. The landscape picture style setting has extra sharpening to define edges of trees, mountains, or buildings. Green and blue tones are enhanced for revealing nature's beauty.
 Canon EOS R Camera
Landscape Picture Style
19. NEUTRAL. For a subdued look with less saturation and contrast you should make your picture style setting neutral.
20. FAITHFUL. Use the Canon picture style called Faithful if you want your photo to render the scene in front of you as you see it with your eyes.
21. FINE DETAIL. Fine detail picture style is defined by vivid images with sharp edges and detailed textures. The big adjustment in processing is centered around sharpening.
22. MONOCHROME. This is a great shortcut to shooting black and white photos without any post processing to be done with software on your computer. You also can set monochrome to sepia for a historical look to your photos.
Additionally you can get real creative with the look of using a red, blue, or green only filter when you use the monochrome picture style. Of course, I'd suggest you shoot a color version of the scene in front of you too in case you want to have more control afterwards on contrast and brightness levels.
23. USER DEFINED. Rather than use the Canon pre-set picture styles, you can customize one or more styles for yourself and save it to your Canon's internal image processing software.
24. ADJUSTABLE. To me, his is where the fun begins. All of the above Canon picture styles can be adjusted and saved as is or adjusted in the future with individual changes in color tone, contrast, saturation, or sharpness that you make using your camera's menu. Here is the complete guide on Canon Picture Styles.
Canon Drive Modes
You may be wondering what are the different Drive Modes on Canon cameras. The drive mode settings are a great way to increase your creativity with your photography. Here are 5 drive modes you will likely have on your Canon camera
25. SINGLE SHOT. This is the normal default mode that ever camera has. Pressing the shutter button results in a single photo being taken.
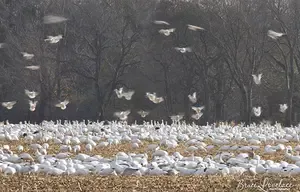
26. CONTINUOUS SHOOTING. Often returned to burst rate, the continuous shooting setting is very valuable when you want to capture a precise moments. The continuous shooting mode is a great setting to use for photographing sports and wildlife.
27. SELF-TIMER. You can delay the actual shutter opening after you press the shutter button, usually for 2 or 10 seconds. Some cameras are programmable for other specific durations.
Use the self-timer for shooting selfies, slow shutter speeds, long exposures, and other situations where you want to avoid camera shake from touching the camera to trigger the shutter.
28. MIRROR LOCK UP. Mirror lock up is a setting that is designed to reduce vibration from the rapid movement of the mirror in a DSLR. It's used when your camera is mounted on a tripod. Use mirror lock up during longer exposures and situations such as high magnification macro photography and astrophotography.
29. MULTIPLE EXPOSURE. You can add a new level of photography by trying some multiple exposures. This setting allows you combine multiple photos into one in your camera.
 Holiday Wreath and Christmas Tree
Multiple Exposure Setting
This was the first time I had used the multiple exposure mode on my Canon 90D. This is a fun setting to play around with, but it takes some trial and error to get an interesting combination of subjects.
What is the best setting for Canon cameras
Looking back at this lengthy post we see that the best camera setting for your Canon is dependent on the shooting situation you're in. Let's take a look at specific photographic scenarios and see what the best recommended setting are for your Canon camera.
If you want to keep it as simple as possible, and you don't mind the camera making all the settings it deems best, then you should choose one of the fully automatic settings and "Set it and forget it."
AUTOMATIC. A fully automatic is the best setting for photographers who don't want to put any thoughts into what to choose. Scene Intelligence Mode, Program Auto Exposure Mode, AI Auto. These are all very similar Canon settings that give most of the control to the camera.
If you want to improve your photos and want a moderate amount of control in how your camera behaves, use of of the semi-automatic camera settings. You'll get better results by using the following guidelines for camera settings in these specific photographic situations.
ACTION. Use shutter priority mode. You can set the shutter speed at a specific number to insure blur free images depending on the specific action you're shooting. An alternative setting to use is sports mode if your camera has that as an option. It's not as precise, but it is a shortcut if you;re not sure what specific shutter speed to try.
ARCHITECTURE. Most serious architectural photography is done with a tripod for perfect sharpness and precise composition, so the drawbacks of using a slow shutter speed can be eliminated. sing aperture priority and a small lens opening for extended depth of field will insure your architectural images are sharply focused.
ASTROPHOTOGRAPHY. Astrophotography is always shot with manual mode. Automatic modes get "fooled" by the unique situation for astrophotography lighting. Shooting in manual exposure mode often involves shooting a few test exposures until you get the effect you want.
CANDIDS. For general snapshots, one of the fully automatic modes is best. Candid photos often happen in an instant and you don't want to miss a shot because you have to adjust any camera settings as you're shooting.
LANDSCAPES. For the best landscape photos use aperture priority and a small aperture setting like f/16 or f/22. This makes all objects in your composition, both close by and distant, in sharp focus.
MACRO. Getting the focus right and obtaining sharp photos is the biggest challenge with shooting macro photography. Insects move and flowers blow in the wind. Both motion blur and focus bluer can be hard to avoid.
The simplest way to go for shooting close-ups is to use a macro mode if your camera has one. Read up on macro photography technique because that will be more important than using the macro setting on your camera. Aperture priority is better for more control of focusing and depth of field, but you have to pay attention to the shutter speed you get because of subject movement.
PORTRAITS. Use aperture priority mode to get the right amount of depth of field. The best f/stop for individual headshot is to use the widest aperture your lens will give you (and a zoomed in telephoto focal length setting). This will give your background a nice out-of-focus look.
For group photos, where your subjects are at different distances from the camera you need a deeper depth of field. For those situations, use an f/stop a few stops smaller than wide open. The other alternative setting to use for shooting is aptly named "portrait mode."
SPORTS. In order to get sharp, blur free images you need a fast shutter speed to freeze the action. Here's a table of suggested shutter speeds to give you a starting point for shooting various action photos.

STILL LIFE. This type of photography involves arranging objects in specific pleasing composition, usually done indoors with artificial lighting. Still life is a broad category of subject. You don't have to worry about blur from using slow shutter speeds if you're using a tripod. Controlling the focus is critical, so this is another type of photography that beckons you to use Aperture priority mode.
WILDLIFE. Usually wildlife photography involves using longer heavier telephoto lenses. Any camera movement during exposure is increased because of the optical magnification that comes with these lenses.
Custom Function Settings
 Custom function 1
You want to know what are Canon custom camera settings. Custom function settings are programmable settings that you can set to anything you want. They are just like the other shooting modes that are choices right along side the other modes on your dial such as aperture priority, shutter priority, manual, and program shooting modes.
Designated as C1, C2, and C3 on most Canon bodies, custom functions can be use to store an example combination of your preferences for camera settings that you would like to use again.
CUSTOM SETTING EXAMPLE. Here's an example of how I set my custom function #1 (C1). I use this setting when I know I'm going to shoot indoor studio portraits with my Novatron strobes. My camera is set for the shutter speed, aperture, ISO, color temperature, RAW Mode, and picture style that I want to start with.
As soon as I'm with an indoor portrait client I can set my Canon to C1 and I know I'm ready to shoot without having to check any of my settings and get the consistent results I want.
Canon Camera Settings Summary
Your Canon camera has a remarkable amount of technology built into it. You have a mind boggling number of options for settings and modes. Don't try to learn them all at once. You'll get overwhelmed.
I've been shooting full time professionally with Canon DSLRs for 20 years and I still only use a handful of different camera settings for a wide variety of subjects. They're not written in the most interesting way, but your camera's manual will be helpful to use to serach for special Canon camera settings.
Have a blast. Shoot a Canon!


Bruce Lovelace is the publisher of Canon Camera Geek. Read more about him on the About Page. He also publishes how to articles and camera gear reviews at the Photography Tips website.
View some of Bruce's photos on Instagram and Flickr. Join the tribe of followers on YouTube. Bruce also runs photo workshops and provides 1 on 1 digital photography coaching.
You might like these
Canon 5D Mark III Scene Intelligent Mode. The Gem of Camera Settings
Here are the results from my Canon 5D Mark III Scene Intelligent Mode test. I confess I never had used either of the automatic modes on my Canon 5D Mark III until now
Best Canon Shutter Mode. Guide To Shutter Priority And Silent Shutter
Answers to your questions on useful camera settings with silent shutter and what Canon shutter mode to use. Why and when to use your electronic shutter.
What is Canon Aperture Priority Mode Setting. Why You Need To Use It
What is aperture on your Canon camera? It's simple to learn and will help you improve your photography. Helpful FAQ and simple video-How use Canon aperture mode
What Are Canon Pictures Styles. Which Picture Style Is The Best To Use
Simple guide on what they are and how to use Canon pictures styles
What Is ISO On A Canon Camera. Why It Matters To Set Canon ISO Right
Simple guide to help you understand what ISO is on your Canon camera. What is ISO and why it's so important Frequently Asked Questions on ISO.


KEH: WHERE I BUY CANON GEAR
"I've found that the condition of the used equipment from KEH is excellent and a whole lot cheaper than buying new" - Bruce, the Canon Camera Geek
You might like these
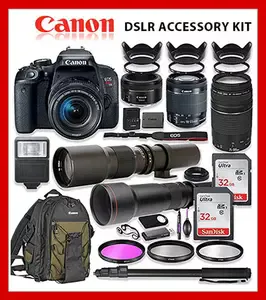
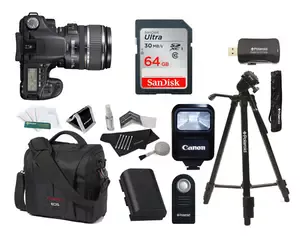
DON'T Buy a Canon Digital Camera Accessory Kit Until You Read This
You've got your digital camera. Should you get extras separately or go with a Canon Digital Camera Accessory Kit
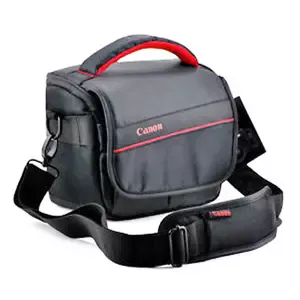
Canon DSLR Accessories. Must Haves And My Top Picks For Canon Gear
What are the top Canon DSLR accessories you should be thinking about getting? There are some essential gadgets you really should have
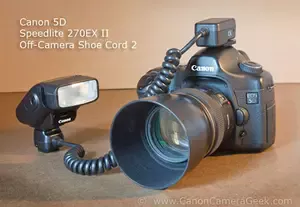
Canon Off-camera Shoe Cord Will Make Your Lighting Spectacular
One of the easiest ways to dramatically improve your lighting is to use a Canon Off-Camera Shoe Cord. Get your Speedlite OFF the Camera
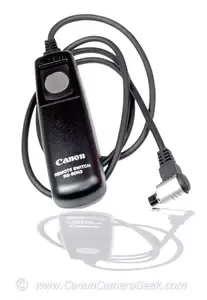
Is A Canon Cable Release Worth Buying? Why Use A Remote Shutter Cord.
What docable release shutter buttons do and should you use a genuine canon cable release for your Canon camera or can you get by with another manufacturer?
Canon Camera Accessories-The 5 Must Have Gadgets And 5 Fun Accessories
Are you searching for Canon camera accessories? Here is what you need to know first. including a helpful list of useful articles on more accessories.
How Do Canon Extension Tubes Work. Are They Any Good And Alternatives
Are they any good and how do Canon extnesion tubes work? Should you get the tubes made by a 3rd party or go with the extension tubes made by Canon


Recent Articles
-
Is a Canon 28-135 Any Good? What's the Canon EF 28-135MM Lens Good For
Apr 22, 26 03:42 PM
 Find out if the Canon EF 28-135mm EF f/3.5-5.6 IS USM is any good for you and what the Canon 28-135 is good for
 -
My G1X Mark II Image Quality Test. What Matters Most Is Sensor Size
Apr 22, 26 03:01 PM
 I tested the G1X Mark II IQ. The specs on the Canon Powershot G1X Mark II are impressive but what about the G1x Mark II image quality
 -
The 3 Canon 100-400 Stabilizer Modes and When to Use Them-Simple Guide
Apr 11, 26 01:16 PM
 It's confusing, but this simple explanation will help you understand and know when to use each of the Canon 100-400 stabilizer modes
 -
Camera Recommendation for Beginner Photographer
Mar 17, 26 06:50 AM
 Hey! I'm looking to get a good beginner camera as a gift for my friend who's interested in getting more into photography. She has a lot of experience
 -
Do you have a Canon EF‑S 17‑55mm f/2.8 IS USM
Mar 16, 26 07:42 PM
Do you have a Canon EF‑S 17‑55mm f/2.8 IS USM, if so where are you located and how much is it? I need this for a canon 90d. Thank you, I already have a -
Canon Camera Guide. Useful Advice on Canon Cameras-Lenses-Accessories
Jan 01, 26 03:43 PM
 Helpful advice on Canon Cameras, Canon lenses, and Canon camera accessories. Answers to your questions about Canon equipment. Canon camera equipment guide.
 -
10 Best Canon G1x Mark II Accessories - Essential Gear For G1X Mark 2
Dec 30, 25 03:59 PM
 Make it fun! Upgrade your Canon Powershot Camera experience with the right Canon G1x Mark II Accessories, equipment add-ons.
 -
The 10 Canon RF 100mm Specs And Features That Matter.
Dec 30, 25 06:49 AM
 Is the RF 100mm Macro worth the upgrade? 10 best features that matter the most. Helpful guide to the Canon RF 100mm specs and eatures you need to know about